
Using Pulumi on Azure Storage Accounts
If you have never heard of Pulumi then do yourself a favour and read up on their official website and then check out my article here.
Caught up on Pulumi and now you’re a fan? Yeah, happens to pretty much everybody I show Pulumi to.
Pulumi Open Source on Azure
Pulumi comes in several variations, free and paid both using the Pulumi SaaS service for things like hosted state management, change tracking, secrets management, RBAC to the stacks amongst many more, and also for those that do not need the Pulumi service you can self-manage the state on cloud storage and then use the Pulumi framework to describe your infrastructure as real code (general purpose languages).
In this article I am going to show you how to store your Pulumi state file on Azure Storage Containers.
Why using Azure Storage for Pulumi is a good idea
In cases where you are all-in on Microsoft Azure and also use Azure DevOps for your CI/CD pipelines and services like Azure Key Vault for secrets management for example, using the paid Pulumi service MIGHT be duplication of services where you already get all the required features from Azure. Nobody wants to pay double, right?
This said, do your own research and make sure that not using the Pulumi service you are not missing out on features.
Creating the Azure State Backend for Pulumi
Pulumi stores its infrastructure state file in json format by default inside the Pulumi service. Here I am going to show you how to deploy the backend on Azure Storage Services.
The examples will be both Azure PowerShell and the Azure CLI, pick whatever works for you.
Prerequisites
Either Azure PowerShell module or Azure CLI (TIP: Use the Azure Cloud Shell)
Latest Pulumi CLI installed in your environment: https://www.pulumi.com/docs/get-started/install/
If you are going to use the CLI, make sure you have thejqcommand installed
Once you are authenticated to Azure, follow these steps, making sure that resource names and locations work for you:
Create the Azure Resource Group
New-AzResourceGroup -Name pulumistate -Location australiasoutheast
or
az group create --name pulumistate --location australiasoutheast
Create the Azure Storage Account
Storage Account names MUST be globally unique. So you most likely won’t be able to use a name without a random string appended to the name. Check the documentation for more information on errors around naming.
$sa = New-AzStorageAccount -ResourceGroupName pulumistate -Name pulumistate -Location australiasoutheast -SkuName Standard_LRS -Kind StorageV2 -AccessTier Hot -EnableHttpsTrafficOnly $true

New-AzStorageContainer -Name state -Context $sa.Context -Permission blob
or
SA=$(az storage account create --name pulumistate --resource-group pulumistate --location australiasoutheast --sku Standard_LRS --access-tier Hot --https-only true --kind StorageV2)
KEYS=$(az storage account keys list --account-name pulumistate --resource-group pulumistate --output json)
export AZURE_STORAGE_ACCOUNT="pulumistate"
export AZURE_STORAGE_KEY=$(echo $KEYS | jq -r .[0].value)
az storage container create --name state
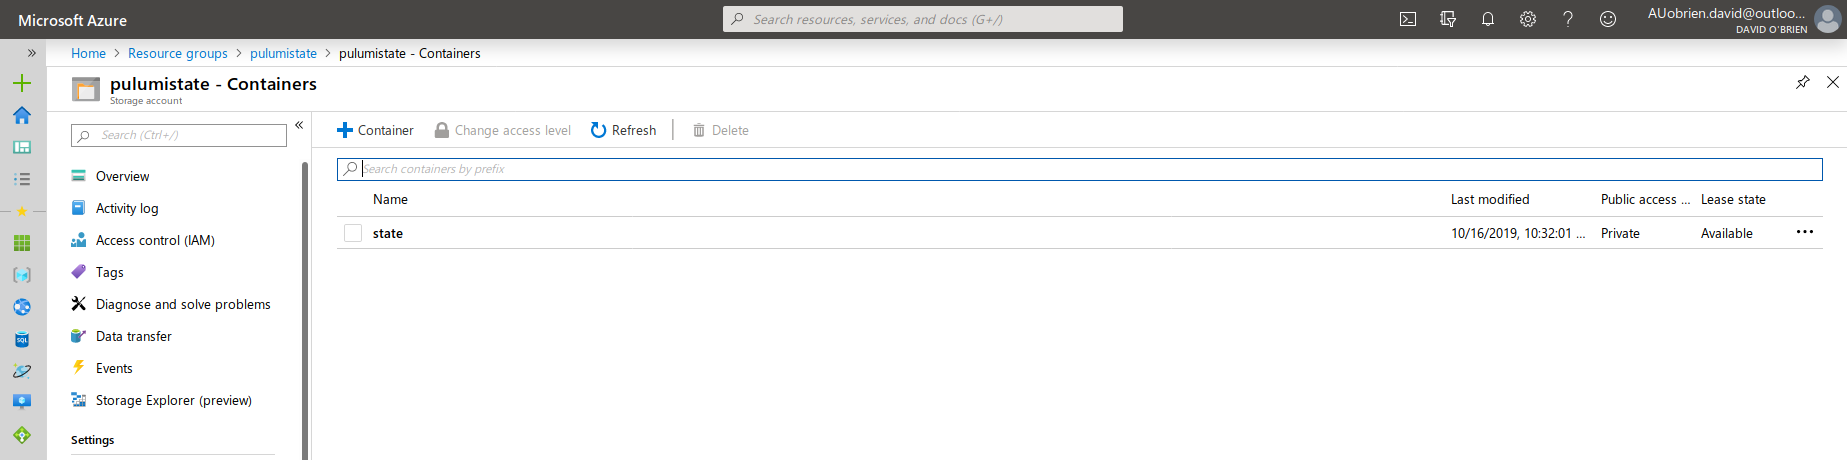
Once you executed either the PowerShell or CLI you should be able to find an Azure Storage Container in your subscription.
Logging Pulumi in to Azure backend
Most of the work is done now and you will soon be able to continue writing your infracode in Pulumi.
Pulumi will use the azure environment variables (your user tokens) to authenticate to Azure Storage when executing the following command:
pulumi login azblob://state
This will configure Pulumi’s backend to the Azure Storage Container.
For more information about the pulumi login command, read the official documentation.
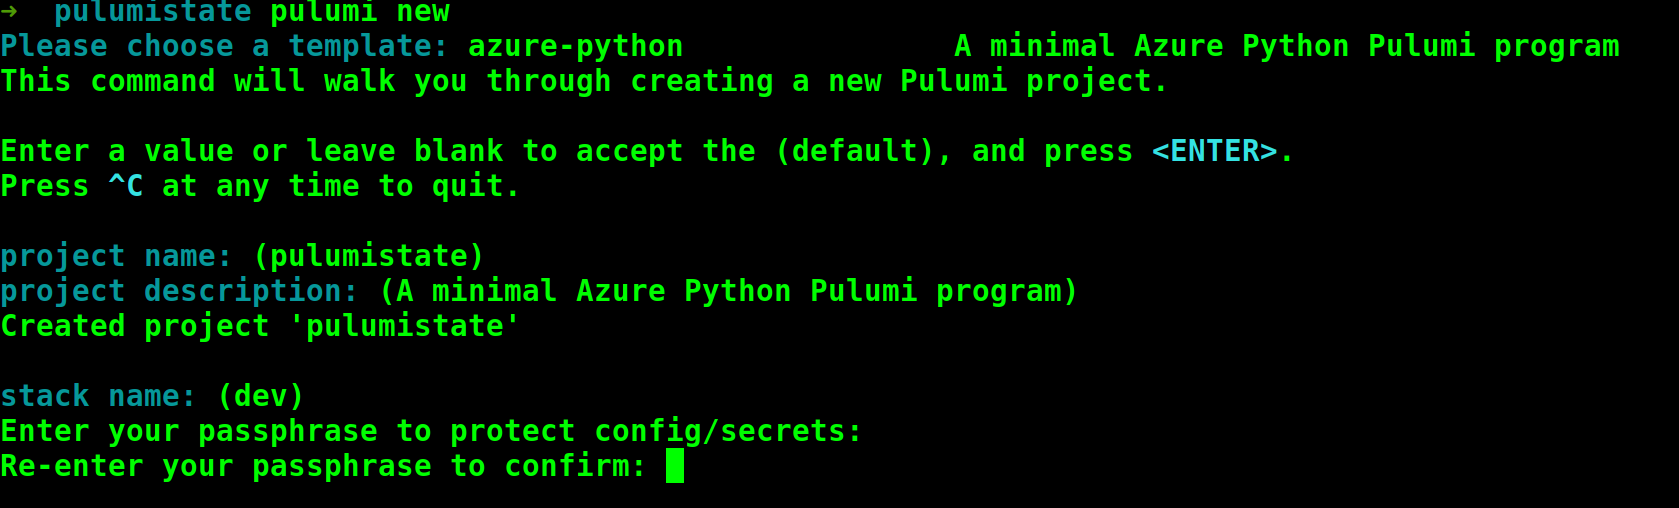
Creating a Pulumi Stack
Creating a Pulumi stack works just the same way as it did before, with one exception, you now need to provide a passphrase that secrets will be protected with.
Running pulumi new in an empty directory will walk you through the stack creation experience as can be seen in this screenshot here.
Once completed we can go over to our Azure Storage Account and check the contents of our container. You should see a folder structure similar to the one in the following screenshot. Something like .pulumi/stacks and a json file in there.

Security Considerations
Pulumi does store secrets securely inside their state files (unlike terraform), however, I would still recommend to make sure that access to the Azure Storage Account is strictly audited and controlled.
Will you be using a self-managed state backend? Or are you going to use the Pulumi service? Let me know in the comments.